
티스토리 뷰
(2022-10-23 build.gradle.kts 포맷 및 써볼만한 기능 예시 추가)
이 글은 Service, Repository와 Test code만 가지는 간단한 예제만 포함합니다.
(회사에서 도입된 것을 공부하고 있는 중이라 복잡한 예제를 글로 쓰기는 어렵네요. ㅎㅎ;)
상세한 내용은 JOOQ Document와 https://github.com/jOOQ/jOOQ/tree/main/jOOQ-examples 등의 링크를 참고하시길 바랍니다.
JOOQ 란?
Compile 시점에서 구문 오류를 파악 가능한 Type Safe 한 Native Query를 만들 수 있고, DB의 Table 정보를 기준으로 Entity를 생성하는 상용 소프트웨어 라이브러리입니다.
활발한 컨트리뷰트 활동과 질문이 이루어지고 있으며 계속 기능들이 확장되고 참고할 만한 레퍼런스가 늘어나는 프로젝트이기에 더욱더 매력적인 라이브러리가 되어가고 있습니다.
JOOQ는 QueryDSL 라이브러리와 비슷한 형태의 Java code를 사용해 Query를 생성할 수 있으며, JPQL에서 지원하지 못하는 여러 표준 SQL을 지원합니다.
Generate Configuration에 따라 POJO, DAO, Procedure 등을 생성하는 편리성도 제공합니다.
Spring Framework의 Boot Project는 JOOQ를 지원하는 AutoConfiguration(COC)도 제공합니다.
Project 생성

Data JPA, Postgres, JOOQ와 Lombok을 추가합니다. (해당 예제에서는 Web 관련 구현을 하지 않고 통합 테스트만 작성합니다.)
docker script
docker run -p 5432:5432 -e POSTGRES_PASSWORD=password -e POSTGRES_USER=name -e POSTGRES_DB=sample --name postgres -d postgres해당 예제에서 사용할 DB는 Docker Image를 통해 간단하게 구성합니다.
build.gradle
// Build.gradle
jooq {
    version = dependencyManagement.importedProperties['jooq.version'] // use jOOQ version defined in Spring Boot
    configurations {
	    main {
            generateSchemaSourceOnCompilation = true // default (can be omitted)
            generationTool {
                logging = org.jooq.meta.jaxb.Logging.DEBUG
				jdbc {
					driver = 'org.postgresql.Driver'
					url = 'jdbc:postgresql://localhost:5432/sample'
					user = 'name'
					password = 'password'
				}
				generator {
					name = 'org.jooq.codegen.DefaultGenerator'
					database {
						name = 'org.jooq.meta.postgres.PostgresDatabase'
						unsignedTypes = false
						inputSchema = 'public'
						forcedTypes {
							forcedType {
								name = 'varchar'
								includeExpression = '.*'
								includeTypes = 'JSONB?'
							}
							forcedType {
								name = 'varchar'
								includeExpression = '.*'
								includeTypes = 'INET'
							}
						}
					}
					generate {
						deprecated = false
						records = true
						immutablePojos = true
						fluentSetters = true
						javaTimeTypes = true
					}
					target {
						packageName = 'jooq.dsl'
						directory = 'src/generated/jooq/'
					}
					strategy.name = 'org.jooq.codegen.DefaultGeneratorStrategy'
				}
			}
		}
	}
}

// Build.gradle.kts
jooq {
	configurations {
		create("main") {
			generateSchemaSourceOnCompilation.set(true)
			jooqConfiguration.apply {
				jdbc.apply {
					driver = "org.postgresql.Driver"
					url = "jdbc:postgresql://localhost:5432/sample"
					user = "name"
					password = "password"
				}
				generator.apply {
					name = "org.jooq.codegen.DefaultGenerator"
					database.apply {
						name = "org.jooq.meta.postgres.PostgresDatabase"
						unsignedTypes = false
						inputSchema = "public"
						forcedTypes.addAll(listOf(
							org.jooq.meta.jaxb.ForcedType().apply {
								name = "varchar"
								includeExpression = ".*"
								includeTypes = "JSONB?"
							},
							org.jooq.meta.jaxb.ForcedType().apply {
								name = "varchar"
								includeExpression = ".*"
								includeTypes = "INET"
							},
						))
					}
					generate.apply {
						withDeprecated(false)
						withRecords(true)
						withImmutablePojos(true)
						withFluentSetters(true)
						withJavaTimeTypes(true)
					}
					target.apply {
						withPackageName("jooq.dsl")
						withDirectory("src/generated/jooq")
						withEncoding("UTF-8")
					}
					strategy.name = "org.jooq.codegen.DefaultGeneratorStrategy"
				}
			}
		}
	}
}
JOOQ가 데이터베이스 정보를 통해 객체를 생성하기 위해 (JType, Dao...), 사용되는 Gradle Task를 정의합니다.
현재 작성된 jooq Task에는
- jdbc datasource 설정 정보(jdbc {..}),
- 관련된 객체를 생성할 데이터베이스, 스키마 정보{database {..}}
- 생성할 객체에 대한 설정 정보(generate {..}),
- JType이 생성될 디렉터리를 지정하는 설정 정보(target {..})
들이 정의되어 있습니다.
해당 글에서는 간단한 구성 정보를 사용하고 있으며 쉽게 알 수 있는 내용이기 때문에 따로 설명하지는 않습니다.
더 많은 구성 정보는 https://www.jooq.org/doc/3.0/manual/code-generation/ 를 확인하시길 바랍니다. **
이제 Domain 구현을 진행합니다.
Account Domain 구현
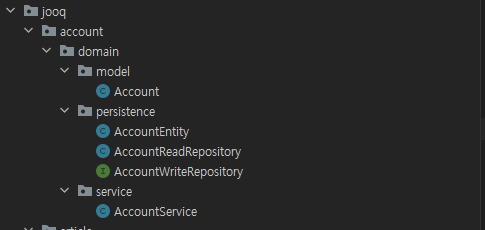
Directory structure
AccountEntity
@Getter
@Entity
@Table(name = "Account")
@NoArgsConstructor(access = AccessLevel.PROTECTED)
public class AccountEntity {

    @Id
    @GeneratedValue(strategy = GenerationType.IDENTITY)
    private Long id;

    @Column(name = "username", nullable = false, unique = true)
    private String username;

    @Column(name = "password", nullable = false)
    private String password;

    @Column(name = "email", nullable = false, unique = true)
    private String email;

    @Column(name = "roles", nullable = false)
    private String role;

    @Builder
    public AccountEntity(Long id, String username, String password, String email, String role) {
        this.id = id;
        this.username = username;
        this.password = password;
        this.email = email;
        this.role = role;
    }

    @Override
    public String toString() {
        return "AccountEntity{" +
                "id=" + id +
                ", username='" + username + '\'' +
                ", password='" + password + '\'' +
                ", email='" + email + '\'' +
                ", role='" + role + '\'' +
                '}';
    }
}
회원 정보를 저장하는 기본적인 형태의 AccountEntity를 정의합니다. 비즈니스 로직은 존재하지 않고, JOOQ가 정상적으로 동작하는지만 파악할 것이기 때문에 객체 상태, 빌더와 toString()만 정의합니다.
Account
@Getter
public class Account {

    private final Long id;
    private final String password;
    private final String username;
    private final String email;
    private final String role;

    @Builder
    public Account(Long id, String username, String password, String email, String role) {
        this.id = id;
        this.username = username;
        this.password = password;
        this.email = email;
        this.role = role;
    }

    public AccountEntity toEntity() {
        return AccountEntity.builder()
                .id(id)
                .username(username)
                .password(password)
                .email(email)
                .role("USER")
                .build();
    }
}
AccountEntity 이전에 값을 가지고 있을 Model을 정의합니다. 마찬가지로 비즈니스 로직이 존재하지 않기에 특별한 로직을 포함하지 않고 getter와 toEntity 메서드만 포함합니다.
AccountWriteRepository
해당 예제에서는 큰 의미를 가지지 않지만, Read와 Write Repository를 분리하여 정의합니다.
- Read와 Write Model가 다르기 때문에 Repository를 분리하기도 합니다만 (대표적으로 DDD) 해당 에제는 Root Entity만 존재하기 때문에 의미가 없습니다.
public interface AccountWriteRepository extends JpaRepository<AccountEntity, Long> {
}
WriteRepository는 Data JPA에서 제공하는 SimpleJpaRepository API를 사용합니다.
AccountReadRepository
ReadRepository는 JOOQ의 DSLContext를 이용해 구현합니다.
existsUserInfo()와 findByUsername() 메서드를 작성하였습니다.
@Repository
@RequiredArgsConstructor
public class AccountReadRepository {

    private final DSLContext dsl;
    private final Account account = Account.ACCOUNT;

    public boolean existsUserInfo(String email, String username) {
        return dsl.fetchExists(
                dsl.selectOne()
                        .from(account)
                        .where(account.EMAIL.eq(email), account.USERNAME.eq(username))
        );
    }

    public AccountEntity findByUsername(String username) {
        /*  명시적 매핑 alias
            dsl.select(
                        account.ID.as("id"),
                        account.USERNAME.as("username"),
                        account.PASSWORD.as("password"),
                        account.EMAIL.as("email"),
                        account.ROLES.as("roles")
                )
                .from(account)
                .where(account.USERNAME.eq(username))
                .fetchOneInto(AccountEntity.class);
        */

        // 묵시적 매핑 - ResultSet 과 Entity field 명 자동 매칭
        return dsl.select()
                .from(account)
                .where(account.USERNAME.eq(username))
                .fetchOneInto(AccountEntity.class);
    }
}
findByUsername()에 작성된 주석에 관하여 더 정리하자면, JOOQ의 Select 결과를 매핑하는 것은 Alias를 통한 명시적 매핑과 묵시적 매핑이 있으며 테이블 조회 결과에 중복되는 필드가 존재하거나, Table과 Entity, DTO 필드 명이 다를 경우, 여러 내부의 객체를 매핑해야 하는 경우 등에는 명시적 매핑을 사용합니다.
AccountService
AccountService는 구현된 Repository를 호출하는 간단한 로직만 작성합니다.
@Service
@RequiredArgsConstructor
public class AccountService {

    private final AccountReadRepository accountReadRepository;
    private final AccountWriteRepository accountWriteRepository;

    public AccountEntity save(Account account) {
        if (accountReadRepository.existsUserInfo(account.getEmail(), account.getUsername())) {
            throw new RuntimeException("This account states is duplicated");
        }
        return accountWriteRepository.save(account.toEntity());
    }

    @Transactional(readOnly = true)
    public AccountEntity findOne(String username) {
        final AccountEntity targetAccount = accountReadRepository.findByUsername(username);
        Assert.notNull(targetAccount, format("account is not Found || username = %s || dateTime = %s", username, LocalDateTime.now()));
        return targetAccount;
    }
}
기존에 등록된 동일한 email과 username를 가지는 유저 정보가 존재하는 경우 Exception을 발생시키는 간단한 검증 로직을 포함합니다.
Test code 작성
정의된 기능이 정상 동작하는지 파악하는 통합 테스트를 작성합니다. 예제의 간소화를 위해 (학습 편의성..ㅎㅎ) 기본적으로 생성되는 ApplicationTest를 이용합니다.
@Transactional
@SpringBootTest
class JooqApplicationTests {

    @Autowired
    private AccountService accountService;

    //..//

    @Test
    void account_save() {

        // Arrange
        final Account newAccount = Account.builder()
                .email("helloWorld@test.com")
                .username("name")
                .password("password")
                .role("USER")
                .build();

        // Act
        AccountEntity savedAccount = accountService.save(newAccount);

        // Assert
        assertNotNull(savedAccount);
    }

    @Test
    void account_findOne() {

        // Arrange
        final Account newAccount = Account.builder()
                .email("helloWorld@test.com")
                .username("name")
                .password("password")
                .role("USER")
                .build();

        accountService.save(newAccount);

        // Act
        AccountEntity targetAccount = accountService.findOne("name");

        // Assert
        assertNotNull(targetAccount);
    }

    //..//

}
지금까지 진행하면서 설정 정보가 잘못 구성되었거나 JOOQ Task를 통해 필요한 객체를 생성하지 않은 경우를 제외한다면 지금까지 작성한 코드는 정상적으로 동작합니다. 버전에 따른 차이가 존재할 수 있으니, 의존성은 최대한 같은 버전으로 지정해주시길 바랍니다.
Article Domain 구현
Directory structure

ArticleEntity
@Getter
@Entity
@Table(name = "Article")
@NoArgsConstructor(access = AccessLevel.PROTECTED)
public class ArticleEntity {

    @Id
    @GeneratedValue(strategy = GenerationType.IDENTITY)
    private Long id;

    @Column(name = "title", nullable = false)
    private String title;

    @Column(name = "description", nullable = false)
    private String description;

    @Column(name = "AUTHOR_ID", nullable = false)
    private Long authorId;

    public boolean isOwner(Long authorId) {
        return this.authorId.equals(authorId);
    }

    public void updateStates(String title, String description) {
        this.title = title;
        this.description = description;
    }

    @Builder
    public ArticleEntity(Long id, String title, String description, Long authorId) {
        this.id = id;
        this.title = title;
        this.description = description;
        this.authorId = authorId;
    }

    @Override
    public String toString() {
        return "ArticleEntity{" +
                "id=" + id +
                ", title='" + title + '\'' +
                ", description='" + description + '\'' +
                ", author=" + authorId +
                '}';
    }
}
게시글 정보를 저장하는 기본적인 형태의 ArticleEntity를 정의합니다. 부가적으로 Account id를 기준으로 소유자를 판단하는 검증 로직을 작성합니다.
Article
@Getter
public class Article {

    private final Long id;
    private final String title;
    private final String description;
    private final Long authorId;

    @Builder
    public Article(Long id, String title, String description, Long authorId) {
        this.id = id;
        this.title = title;
        this.description = description;
        this.authorId = authorId;
    }

    public ArticleEntity toEntity() {
        return ArticleEntity.builder()
                .id(id)
                .title(title)
                .description(description)
                .authorId(authorId)
                .build();
    }
}
ArticleEntity 이전에 값을 가지고 있을 Model을 정의합니다.
ArticleWriteRepository
설명 생략
public interface ArticleWriteRepository extends JpaRepository<ArticleEntity, Long> {
}
ArticleReadRepository
ArticleReadRepository에는 getPage와 findById 메서드를 구현합니다.
@Repository
@RequiredArgsConstructor
public class ArticleReadRepository {

    private final DSLContext dsl;
    private final Article article = Article.ARTICLE;

    public Page<ArticleEntity> getPage(Pageable pageable) {
        List<ArticleEntity> articles = dsl.select()
                .from(article)
                .limit(pageable.getPageSize())
                .offset(pageable.getOffset())
                .fetchInto(ArticleEntity.class);
        return new PageImpl<>(articles, pageable, dsl.fetchCount(dsl.selectFrom(article)));
    }

    public ArticleEntity findById(Long id) {
        return dsl.select()
                .from(article)
                .where(article.ID.eq(id))
                .fetchOneInto(ArticleEntity.class);
    }
}
Spring Project에서 Pagination을 위해 주로 사용하는 Pageable Interface를 이용해 getPage 메서드를 정의하였습니다.
ArticleService
Account id를 통해 요청을 검증한 뒤 Article을 수정하거나 삭제하는 메서드와 조회 메서드를 정의합니다.
@Slf4j
@Service
@RequiredArgsConstructor
public class ArticleService {

    private final ArticleWriteRepository articleWriteRepository;
    private final ArticleReadRepository articleReadRepository;

    public Page<ArticleEntity> gets(Pageable pageable) {
        return articleReadRepository.getPage(pageable);
    }

    public ArticleEntity getOne(Long articleId) {
        final ArticleEntity targetArticle = articleReadRepository.findById(articleId);
        Assert.notNull(targetArticle, "article not found");
        return targetArticle;
    }

    public ArticleEntity addArticle(Article article) {
        return articleWriteRepository.save(article.toEntity());
    }

    public ArticleEntity updateArticle(Article article, Long authorId) {
        final ArticleEntity targetArticle = getOne(article.getId());
        if (targetArticle.isOwner(authorId)) {
            targetArticle.updateStates(article.getTitle(), article.getDescription());
            return targetArticle;
        }
        log.info("This account is not owner || targetId = {} || author id = {} || date = {}", article.getId(), authorId, LocalDateTime.now());
        throw new RuntimeException("This account is not owner");
    }

    public void deleteArticle(Long articleId, Long authorId) {
        final ArticleEntity targetArticle = getOne(articleId);
        if (targetArticle.isOwner(authorId)) {
            articleWriteRepository.delete(targetArticle);
            return;
        }
        log.info("This account is not owner || targetId = {} || author id = {} || date = {}", articleId, authorId, LocalDateTime.now());
        throw new RuntimeException("This account is not owner");
    }
}
Test code 작성
이제 ArticleService와 관련된 테스트 코드를 추가로 작성합니다.
@Transactional
@SpringBootTest
class JooqApplicationTests {

    //..//

    @Autowired
    private ArticleService articleService;

    //..//

    @Test
    void article_gets() {

        // Arrange
        final Account newAccount = Account.builder()
                .email("helloWorld@test.com")
                .username("name")
                .password("password")
                .role("USER")
                .build();

        AccountEntity author = accountService.save(newAccount);

        for (int i = 0; i < 10; i++) {
            Article article = Article.builder()
                    .title("title" + i)
                    .description("description" + i)
                    .authorId(author.getId())
                    .build();

            articleService.addArticle(article);
        }

        // Act
        Page<ArticleEntity> page = articleService.gets(PageRequest.of(0, 10));

        // Assert
        assertFalse(page.isEmpty());
    }

    @Test
    void article_addArticle() {

        // Arrange
        final Account newAccount = Account.builder()
                .email("helloWorld@test.com")
                .username("name")
                .password("password")
                .role("USER")
                .build();

        AccountEntity author = accountService.save(newAccount);

        Article article = Article.builder()
                .title("title")
                .description("description")
                .authorId(author.getId())
                .build();

        ArticleEntity savedArticle = articleService.addArticle(article);

        // Act
        ArticleEntity targetArticle = articleService.getOne(savedArticle.getId());

        // Assert
        assertNotNull(targetArticle);
    }

    @Test
    void article_updateArticle() {

        // Arrange
        final Account newAccount = Account.builder()
                .email("helloWorld@test.com")
                .username("name")
                .password("password")
                .role("USER")
                .build();

        AccountEntity author = accountService.save(newAccount);
        Long authorId = author.getId();

        Article article = Article.builder()
                .title("title")
                .description("description")
                .authorId(authorId)
                .build();

        ArticleEntity savedArticle = articleService.addArticle(article);

        final Article updateArticle = Article.builder()
                .id(savedArticle.getId())
                .title("update title")
                .description("update description")
                .authorId(authorId)
                .build();

        // Act
        ArticleEntity targetArticle = articleService.updateArticle(updateArticle, authorId);

        // Assert
        assertNotNull(targetArticle);
    }

    @Test
    void article_deleteArticle() {

        // Arrange
        final Account newAccount = Account.builder()
                .email("helloWorld@test.com")
                .username("name")
                .password("password")
                .role("USER")
                .build();

        AccountEntity author = accountService.save(newAccount);
        Long authorId = author.getId();

        Article article = Article.builder()
                .title("title")
                .description("description")
                .authorId(authorId)
                .build();

        ArticleEntity savedArticle = articleService.addArticle(article);

        // Act & Assert
        articleService.deleteArticle(savedArticle.getId(), authorId);
    }
}
다 작성하였다면 ArticleService에 정의된 메서드 동작을 확인하는 테스트 코드를 작성하고 실행해봅니다.
이번 글은 여기까지입니다.
최근 단순한 구현 예제나 제가 학습한 내용을 기준으로 작성하는 글을 소소한 글이라는 prefix를 붙여 게시하고 있는데요. 꾸준한 학습을 하는데 나름 도움이 되고 있는 것 같습니다.
(정작 영양가는 별로 없는 것 같지만요. ㅎㅎ; 노력하겠습니다..)
이후에 JOOQ를 학습하여 해당 에제에서 제외된 한 Entity 내부의 여러 객체에 필드를 매핑하는 것이나 JOOQ 최적화와 관련된 내용을 정리하고 해당 글을 좀 더 정제하기 위해 노력할 예정입니다. 여기까지 봐주셔서 감사합니다.
잘못된 내용은 댓글이나 우측 하단에 있는 메신저를 통해 말씀해주시길 바랍니다.
추가로 사용해볼만한 기능들
DefaultRecordListener
class AuditingListener : DefaultRecordListener() {

    override fun insertStart(ctx: RecordContext) {
        when (val record = ctx.record()) {
            is Article -> {
                record.createDate = LocalDateTime.now(ZONE_OF_KOREA)
                record.updateDate = LocalDateTime.now(ZONE_OF_KOREA)
            }
            is Account -> {
                record.createDate = LocalDateTime.now(ZONE_OF_KOREA)
                record.updateDate = LocalDateTime.now(ZONE_OF_KOREA)
            }
            else -> super.insertStart(ctx)
        }
    }

    override fun updateStart(ctx: RecordContext) {
        when (val record = ctx.record()) {
            is Article -> {
                record.updateDate = LocalDateTime.now(ZONE_OF_KOREA)
            }
            is Account -> {
                record.updateDate = LocalDateTime.now(ZONE_OF_KOREA)
            }
            else -> super.updateStart(ctx)
        }
    }

    /*
    override fun storeStart(RecordContext ctx) {}
    override fun storeEnd(RecordContext ctx) {}
    override fun insertEnd(RecordContext ctx) {}
    override fun updateEnd(RecordContext ctx) {}
    override fun mergeStart(RecordContext ctx) {}
    override fun mergeEnd(RecordContext ctx) {}
    public void deleteStart(RecordContext ctx) {}
    override fun deleteEnd(RecordContext ctx) {}
    override fun loadStart(RecordContext ctx) {}
    override fun loadEnd(RecordContext ctx) {}
    override fun refreshStart(RecordContext ctx) {}
    override fun refreshEnd(RecordContext ctx) {}
    override fun exception(RecordContext ctx) {}
    */
}
Record를 처리하는 Cycle마다 하고 싶은 로직을 추가할 수 있는 Interface로 Entity의 생성, 수정 날짜를 조정하는 위 예시 이외에도 Record를 조작할 필요가 있다면 사용해볼 수 있습니다.
DefaultExecuteListener
class SlowQueryListener : DefaultExecuteListener() {
    private val logger: KLogger = KotlinLogging.logger { }
    private lateinit var watch: StopWatch

    override fun executeStart(ctx: ExecuteContext) {
        super.executeStart(ctx)
        watch = StopWatch()
    }

    override fun executeEnd(ctx: ExecuteContext) {
        super.executeEnd(ctx)
        if (watch.split() > ONE_SEC_TO_NANO) {
            logger.info { "${ctx.connection().metaData.url} Slow Query Detected! ${ctx.query()}" }
        }
    }

    /*
    override fun start(ctx: ExecuteContext?) {}
    override fun renderStart(ctx: ExecuteContext?) {}
    override fun renderEnd(ctx: ExecuteContext?) {}
    override fun prepareStart(ctx: ExecuteContext?) {}
    override fun prepareEnd(ctx: ExecuteContext?) {}
    override fun bindStart(ctx: ExecuteContext?) {}
    override fun bindEnd(ctx: ExecuteContext?) {}
    override fun outStart(ctx: ExecuteContext?) {}
    override fun outEnd(ctx: ExecuteContext?) {}
    override fun fetchStart(ctx: ExecuteContext?) {}
    override fun resultStart(ctx: ExecuteContext?) {}
    override fun recordStart(ctx: ExecuteContext?) {}
    override fun recordEnd(ctx: ExecuteContext?) {}
    override fun resultEnd(ctx: ExecuteContext?) {}
    override fun fetchEnd(ctx: ExecuteContext?) {}
    override fun end(ctx: ExecuteContext?) {}
    override fun exception(ctx: ExecuteContext?) {}
    override fun warning(ctx: ExecuteContext?) {}
    */

    companion object {
        const val ONE_SEC_TO_NANO: Long = 1000000000L
    }
}
Query를 처리하는 Cycle마다 하고 싶은 로직을 추가할 수 있는 Interface로 StopWatch를 통해 Slow Query를 파악하는 위 예시 이외에도 사용되는 Connection을 통해 실제 요청이 가는 Node의 정보를 확인하거나 SQL에 사용될 변수를 조작하는 등의 일을 해볼 수 있습니다.
다른 예제들
최근에 작성한 글 이외에도 학습을 위해 Github에 간단한 Project를 작성하고 있는데요. 필요하시다면 참고하시고, 피드백을 남겨주셔도 좋을 것 같습니다. ㅎㅎ
이 예제는 https://github.com/Lob-dev/The-Joy-Of-Java/tree/main/Study-Spring-Boot-JOOQ에서 확인할 수 있습니다.
참고 자료
'Programming' 카테고리의 다른 글
| Galera Cluster의 기본적인 성능 개선 지점과 방향성 (0) | 2022.01.30 |
|---|---|
| 소소한 글 : Java Lambda를 활용하여 Dynamic Proxy의 Self Invocation 회피하기 (0) | 2021.10.18 |
| 소소한 글 : Spring AOP 예제를 차근차근 구현해보기 (0) | 2021.09.22 |
| 소소한 글 : Base Column를 정의할 때 @MappedSuperclass 와 embedded Type 중 무엇을 사용해야 할까? (2) | 2021.09.11 |
| Monitoring : 프로메테우스를 이용하여 프로젝트 매트릭 수집하기 (0) | 2021.09.07 |
- Total
- Today
- Yesterday
- java
- mybatis
- lambda
- 커뮤니티 오거나이저
- JDK Dynamic Proxy
- URN
- AMQP
- transaction
- RESTful
- Redis Key
- HTTP
- 2025년 회고
- spring AOP
- Request Collapsing
- JVM
- URI
- cglib
- Url
- 한국 스프링 사용자 모임
- WiredTiger
- 게으른개발자컨퍼런스
- 근황
- RPC
- spring
- Optimistic Locking
- configuration
- 회고
- rabbitmq
- JPA
- Switch
| 일 | 월 | 화 | 수 | 목 | 금 | 토 |
|---|---|---|---|---|---|---|
| 1 | 2 | 3 | 4 | |||
| 5 | 6 | 7 | 8 | 9 | 10 | 11 |
| 12 | 13 | 14 | 15 | 16 | 17 | 18 |
| 19 | 20 | 21 | 22 | 23 | 24 | 25 |
| 26 | 27 | 28 | 29 | 30 | 31 |